I thought I would share some information on what my anvil setup is, and how to setup an anvil. Firstly you could use almost any steel with a flat surface as anvil. However the mass and hardness of the anvil will affect the ease and quality of the work done on the anvil.
There are many styles of anvils as well as different price points. There are inexpensive anvils out there but you want to avoid cast anvils which will be less expensive than forged anvils. The rationale is pretty simple cast is not nearly as strong as forged steel. You could use a cast anvil from Harbor Freight or Grizzly successfully for a while, but eventually it is going to crack. If you look a the cost of new anvils it is clear why most folks go with a used anvil and live with any issues or limitations.
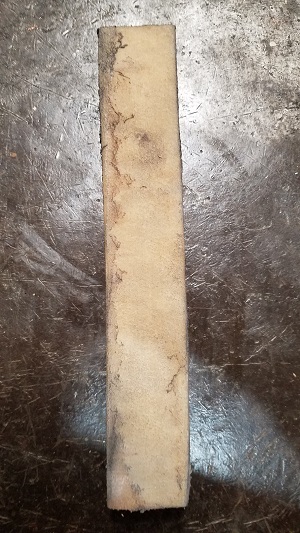
There are many anvils available used at online sites or actions. There is nothing wrong with a used anvil as long as you are aware of what you are buying or what the limitations are. A high quality anvil will be forged from tool steel. One simple method of testing an anvil is to loosely hold a hammer in your hand and let it fall from about 12″ (your hand should just be guiding it). The anvil should ring and the hammer should bounce off the anvil to approximately 50% of the drop height and a sharp note should be heard. If the hammer does not bounce well or the ring sounds dull, I would avoid that anvil. The face of the anvil should be flat and be devoid of cracks, fissures, etc.
Depending on the anvil there could be two different holes in the face. The square hole is called the hardy hole and is typically 1″x1″. This is used to mount tools for hot work such as cuttoff tools, fuller dies, etc. The second round hole varies in size depending on the anvil and is called the pritchet hole. The pritchet hole can be used when hot punching or to hold tools or special clamps.
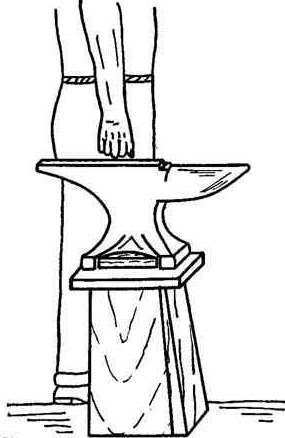
Once you have an anvil there are two critical choices that have to be made. How to attach the anvil to a stand and what the height of the anvil face will be. In general the anvil face should be such that if you hold a hammer on the face of the hammer your elbow should be at 90 degrees. This height minus the height of the anvil will determine the height of the required mount.
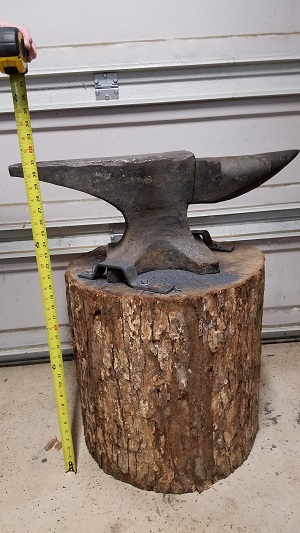
The mount for the anvil could be anything from a metal stand to a round of wood. My anvil is mounted on a round of white oak. Any reasonably strong dense would should work. I would avoid pine or any other woods that are not very dense. As you can see in the pictures above the face of my anvil is pretty rough around the edge and the step. I should get the face milled, but even though the edges are not square it hasn’t caused me many issues. I bought this anvil along with a 4′ x 4′ steel welding table for $300 at auction. You will find that anvil prices vary greatly and that they get snapped up pretty quickly not only by folks wanting to do smithing, but fashion designers and antique sellers.
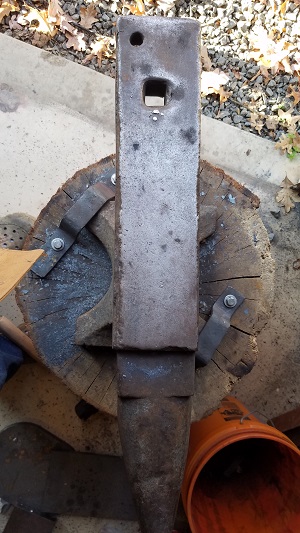
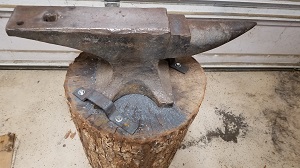
The next major consideration is how to mount the anvil to the stand. There are lots of attachment options, one that simple and favored by some folks is chains. I tried chains for about 5 months and no matter how tight I tried to make the chains the anvil moved around too much.
In the end I forged some simple brackets out of 1″ x 1/8″ bar stock that go over two of the feet. I attached it the oak round using 4″ lag bolts. The anvil does not move an iota now and is rock solid. It was definitely worth the minimal effort required to make the mounts.