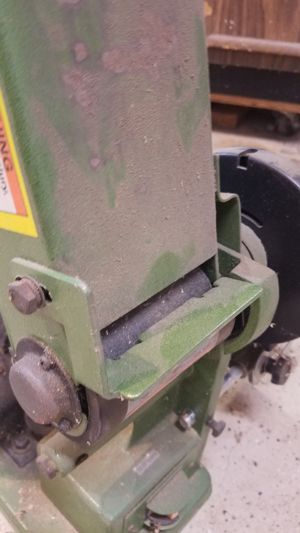
I am using a 4″ x 36″ stationary sander from Harbor Freight to grind with.  I did some minor modifications to it to make it easier to use.  These can be found on sale fairly regularly for about $60. I removed the belt guards and the tool rest because to change a belt they have to be removed.  As you work on grinding out a knife you will need to switch belts for the appropriate grit and as they wear out.  I also added a bar to hold the grinder in place on the workbench so it doesn’t slide around when grinding.

Picture of Sander with guard and work rest installed
Sander with guard and work rest installed
Picture of Modified Sander
Modified Sander


Picture of sander mounting bar
Sander mounting bar


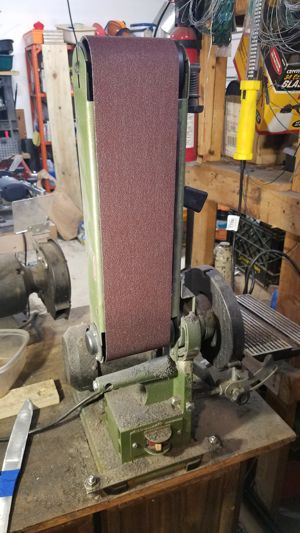
I started by using the 80 and 120 grit belts available from Harbor Freight.  Somewhere I picked up some 40 grit belts as well.  They will remove stock but it takes a long time.  I still use Harbor Freight 80 grit belts for initial shaping of the handle or any other task where I don’t want to damage or put extra wear on my “good” belts.  I found some Zirconia belts from Red Label Adhesives that last longer and are available in coarser grits but of course cost more.  I use the 24 grit belt for  rough metal stock removal. As the grinding process continues work my way through the other grits (typically 40 and 80) as the blade gets closer to being ready for hardening.

It takes more time than desirable using this setup.  It cannot remove material anywhere near as fast as most 2″ x 72″ grinders.   The lack of different sized pulley wheels makes hollow grinding almost impossible.  The only spot to attempt a hollow grind is using one of the ends of the grinder but free-handing without a work piece rest requires a very steady hand.

Deciding how much material to leave prior to hardening can be difficult (at least for me).  All of the hammer marks should be ground out at this stage.  You want to remove as much stock as possible to reduce the grinding time after tempering, however you need to leave enough meat on the knife to prevent warping during the quench.  This is less of an issue if you are edge quenching versus quenching the entire blade.

After the blade is hardened and then tempered I will go back to the grinder and grind with 80, 120,  220, and 400 grit belts. 

I have been working on blacksmithing and knifemaking for a couple of years.  I started with a minimal investment and made the forge myself.  A friend of mine had made a little forge using the rear break drum from a truck and had attached a piece of steel pipe that eventually transitioned to a PVC pipe.  He was using charcoal for fuel and a hairdryer for air.  His forge was held up by cinder blocks and he was using a railroad track joiner as an anvil.  To keep the charcoal from falling down the pipe he used a couple of layers of stainless steel 1/2″ mesh. 

I took his idea and made some improvements.  I welded on an adapter flange that allows 2″ black pipe to be screwed in. A T about a foot down from the break drum allows air to come in and the ashes to fall to the bottom.  A screw cap at the bottom holds the ashes up and allows the air to only flow upward into the forge.  Using an old bed frame I made a stand that holds the forge and the squirrel cage fan.  I used metal flexible hose to bring the air from the fan into the T.  I bought a fan with variable speed control built in on Amazon.  The break drum can be bought from automobile shops or junkyards for a few dollars. 

 In general this setup works pretty well, however the fan output doesn’t vary enough between the lowest and highest setting.  I also wish the fan produced more airflow when turned up all the way.

Picture of Homemade Charcoal/Coal Forge
Homemade Charcoal/Coal Forge
Picture of Charcoal Forge Side View
Charcoal Forge Side View
Picture of Charcoal Forge Close Up
Charcoal Forge Close Up

After using the forge for a while one issue was the stainless steel mesh holding up the charcoal clogs after a while and restricts airflow.  To remedy this I took some 1/4″ square stock and built a circular “mesh” with about half inch gaps between the steel.  This works much better and cleans out pretty easy since you can just take out the grill and bang it on something to clean out the debris and clinkers.

Picture of Charcoal Forge Top View
Charcoal Forge Top View

This setup definitely works, but it takes a while to get the charcoals up to temperature and heating the stock takes a while.  Better airflow from the fan would help with both of those issues.  A charcoal forge can reach temperatures of 1600 degrees Fahrenheit which is hot enough to do any forging except forge welds. A few other down sides is you will definitely smell like smoke and you have to dispose of the ashes fairly regularly.  I found I could forge for about 2 hours but after that there were air flow restrictions from the ash and clinkers that greatly reduced the efficiency.

Picture of Charcoal Forge and Anvil
Charcoal Forge and Anvil